
Your Home Should Be
Your Safe Haven
But could it be making you sick? Most people don't learn about mold until it hits them, and that's what we're trying to help change.

One comprehensive assessment with the ability to detect more than just mold.
Many "inspections" are a basic 30-60 minute walkthrough with a couple random air samples and a vague report. Ours is a multi-layer, multi-hour detailed evaluation of your home. Bringing you real answers requires a thorough investigation of the home while understanding environmental health sensitivities, building science, and proper testing and remediation protocols.
Eight deliberate components, in order, working together: a detailed client interview, a systematic visual scan, MVOC and sensory observation, thermal imaging, moisture metering, borescope inspection, strategic sampling, and a plain-English report with ongoing support. Each layer is a different data point. Together, they give the picture you actually need.
One offering. One standard. No upsell menu.
Click to see the assessment process →Why a real assessment is different
One data point isn't a diagnosis.
A single air sample is a coin flip. A real assessment is a forensic, multi-layer investigation — a conversation, a visual scan, thermal imaging, moisture metering, borescope work, and strategic sampling. Each layer is a data point. Together they give the picture building science actually requires.
A 30 minute walkthrough is not a real assessment.
A thorough inspection is not a fly-through with a clipboard. It starts with a detailed client interview — understanding the occupants health and symptoms, the history of the home, renovations, the HVAC, and more. Numerous deliberate steps are taken before a single sample is taken. Shortcuts in the beginning are what lead to recurring problems in the future.
Trusted by doctors nationwide.
We are referred by countless doctors, CIRS practitioners, and health professionals in 22+ states. This is due to our health focused evaluation that integrates source identification, building science, and environmental health. When a patient's recovery includes lowering their exposure risk at home, they deserve an indoor environmental specialist.
The Mold Timeline
Regardless of your starting point, our goal is getting you to Step 7 as efficiently as possible.
Beginning
Exploration, Data Gathering, & Prep
Our ServiceInvestigate
Consultation, Inspection & Testing
Our Core ServicePlan & Prioritize
Establish Remediation Workplan/Protocol
Our ServiceRemediation & Cleaning
(This is to be done by a remediation company who follows a 3rd-party protocol)
3rd Party — We Guide YouPost Remediation Verification
(This Clearance Inspection & Testing should done by a 3rd-party inspector)
Our ServiceCompletion
Finalize Remediation and Build Back
3rd Party — We Guide YouProactive Maintenance
Optimize, Maintain, Monitor, & Move On
You — With Our SupportWant a guide through these steps? Andrew offers a 1-on-1 virtual consultation — clear answers and a confident next step, wherever you are. Starting at $247.
Unfortunately many people don't learn about mold until it hits them. That's what we're trying to help change by detecting these issues before they become major or systemic.
— Andrew Melrose, Founder & Lead Inspector
Based in the Carolinas, working nationwide — in person when it's warranted, virtually when it's not.
Trusted by doctors and practitioners in 22+ states.
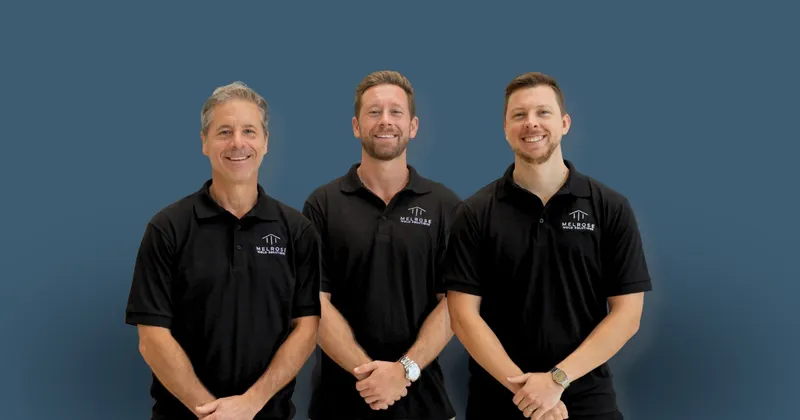
Before you spend a dollar with us, learn what you can for free.
Here are 3 of the most useful videos on the channel for homeowners just starting to learn.
Read the transcript
Hey, I'm Andrew with Melrose Mold Solutions, and I want to make mold very simple for you to understand so it doesn't stress you out, you don't get confused with a bunch of conflicting information. How it's dealt with might be conflicting at times by a lot of different sources, but mold itself can be made simple. That's what I'm going to do right here. I'm going to talk about what it is, the two ways it can grow, and how to remove it and handle it.
So that's the point of this video. I have many, many more videos. Go and watch all those for more details on a lot of different things, but let's get into what mold is. So mold is essential.
It's nature's decomposing agent where the spores from all over nature, it's essential. It's fungi, it's in the fungi kingdom. It's a mix between a plant and an animal at a species level once fungi gets growing. But the spore is like a microscopic little seed, and they are prevalent in nature everywhere.
The plants have pollen and spores and bacteria and all these chemicals and things that they are constantly living with in our ecology. So spores are everywhere, they're unavoidable. But when those spores land on materials that are able for it to grow into, mostly a plant or a tree, so when it starts to kind of colonize on a surface, it's because it got moisture into the material and mixed with a spore. Okay, so that's how I want to conceptualize it.
Okay, so we have the ground, we have a spore landing in, and then we have moisture, okay, dripping here, and then we have it starting to root. It's called mycelium, but it's really called hyphae. Okay? And now it's here and it's starting to grow.
It's like a plant or a tree. So now we have a colonized source, okay? The spore, the material itself, the moisture, mold can exist at the right temperature. It's not going to grow in the freezing temperatures or in crazy hot conditions, but the temperatures that we're all living in, it will live in as well.
So it's a very easy science experiment based on what you know it is, like a plant or tree. That doesn't look like it now, but mold is like a plant or a tree, so be thinking that way on how it grows, okay? So the two ways it can grow is in a localized spot where the spore or spores, a bunch, can land on a surface. The material is ready or primed or conducive for that growth because of the moisture content, whether from outside, you know, leak, humidity, buildup on a surface, whatever it may be.
So the two ways it can grow is a localized spot where a leak happens, there's acute water damage under a sink, it gets trapped, it doesn't dry in time. That's the key. If this all happens, but the drying happens within 24 to 48 hours or in a short period of time, then mold's not going to have a place to plant itself and grow into. A plant doesn't grow right away.
It does take that time to colonize and embed itself into the soil the same way mold would. So if a water damage leak or leak happens, we want to keep it localized and dry it and do what we need to so that mold doesn't have a chance to grow. That is the obvious, right? So floods happen, leaks around in showers, around plumbing, it can happen in any home.
If we don't have any localized places where mold's had a chance to embed itself into that material, now we need to be thinking more atmospherically. That's what I would call the atmospheric or the non-local way that mold can grow. Quick story, first time it hit me maybe three or four weeks into testing and doing inspections professionally five plus years ago, I got to an apartment that they called me in on. They said they had mold everywhere.
So I got in there and they had turned their HVAC system off for like seven to ten days and they were out of town. Humidity spiked and they had white and green spots all over their house. It was behind picture frames, it was on couches. I'm like, what the heck happened?
So it was an atmosphere, chronic humidity, trapped humidity, non-local issue. Non-local meaning it was spotting everywhere it could happen. So that was like a science experiment. If we do a really dark, tight environment, no airflow, no circulation, and we add a bunch of dust and carpets and materials, right?
And the spores are already in there because there's no avoiding some spores everywhere at all times. But when those spores now have a place to colonize and reproduce, which is truly what they do at a micro level, and then we then, this is the key, we spray some humidity or moisture and mist that place and cause that rainforest effect and we walk away from that tight environment, we have created an atmospheric non-local mold issue. So this is more avoidable if we know how the home is functioning, that we have good airflow, less dust content, humidity levels are in range, because the localized area is where enough moisture has condensated or leaked into actual water. Well, the atmospheric issue can happen where you don't even see the water.
It's just humidity. It's a vapor in the air that's high enough in that 60 plus percent chronically, where that humidity is getting trapped or accumulating over time and staying stagnant. And now mold can grow literally in and on dust first and other materials where it can grow on more porous. That's where it comes to the next one.
So what is it? It's like a plant or a tree. How does it grow? Localized spot embedding itself in the material or non-locally just spotting.
And then now how do we remove it? Well, like a plant or a tree, we need to uproot it. Okay? If you just take bleach, don't do that.
If you just take bleach and wipe the top layer off of a localized mold issue where you're really just taking the top layer off, we still have the mold here and it can regrow. Okay? So that's like plucking the top of a leaf off and it still has its roots, right? So if it's in a porous item where the mold has embedded itself into, we got to take it out entirely.
So number one step to remove mold, obviously, if it's in drywall, which is a porous material, it's got paper on top and gypsum behind it, or if it is, yeah, other paper, cardboard products, if it's in carpet, if it's in insulation, okay? These are the porous items that mold can grow on. You know, if it's visible on clothing, just throw it away. Not really cleanable.
The porous material makes it so it's going deeper embedded in those fibers. No real cleaning it, not worth saving. Next up, if you've gotten the drywall, let's say, taken out, we had a leak, it affected the framing back there and the insulation and the drywall. Now we take the drywall out, we take the insulation out completely, and then we manually clean the framing behind there.
If the framing is fully saturated and like really, really not salvageable, then yes, we throw that away too. But wood is a little bit less porous, okay? So it's got a harder surface where the moisture and mold didn't grow maybe as deep into it. It depends on the type of wood and several other factors on how much water and how long term and all those different factors.
Hire a professional or myself for that. But if it's just light surface growth on the outside of wood, we can manually clean it. So we clean by cleaning the top of it, yes, but then we want to scrub down and sand down into the material enough to get those roots out. Maybe we're using peroxide solution.
I have a whole video on how to remove mold and I can link it here as well. I really go by the IICRC S520 mold remediation protocol standards. That's the best way to do it. After the heavy lifting is done of the removal, then we want to do a detail clean.
And this is really key because that is, think of all the leaves or pine needles that if you were to drag an old Christmas tree out of the house, maybe the pine needles are left behind. So that's why we do, we take it out, we manually clean kind of abrasively, aggressively to get into the material and clean it out. Maybe that's concrete material, we're scrubbing it, or wood material, we're scrubbing it out. Peroxide, again, I have all the details in other videos.
And then we do a detail clean. This is really just a really tedious, very detailed dusting. It's got HEPA vacuuming. It's a type of vacuum that's going to collect all the smaller micron spores and things and everything that's got disturbed in the process and not recycle it.
So a good sealed HEPA vacuum is key. And then we want to do a microfiber towel cleanup off the surfaces, okay? So remove the materials that can't be saved, deep clean the materials that can be saved and will be saved there, make sure they're dry, and then a final deep cleaning to get those areas completely dust-free. I'm not saying you necessarily should do this, but this is what the IICRC protocols would say based on a mold situation.
So I have a 16-page mold removal mode I have a 16-page mold removal guide that has all these steps in vivid, vivid detail. And this video is very helpful to kind of visualize it as well. All depends on how you learn. I like watching and listening as well as having a written document.
So get the mold removal guide, how to avoid remediation mistakes and save a lot of money. So that is going to be also linked here. It's free. Get it downloaded, have something to reference.
You're now armed with the right knowledge and the right language that if you have a professional remediation team, any of this were to happen in your home, you're now armed with the right language and hopefully should navigate properly. If you need my help one-on-one, I am available for that, but I want everyone to just know how this is so it doesn't feel like it's just not rocket science and it doesn't feel overly confusing. Now, this is what it is and how it grows. The two ways to grow is oversimplifying it because this atmospheric issue can be so many different things in the home, HVAC system issues, building errors, how the home is designed and how airflow is coming in in different places.
There are several factors in the building science and building biology world that can cause mold to happen in different places, but these are the basic things that we as homeowners and renters can do within our control to be aware of the localized spots so there's not a leak happening that we're unaware of and different kind of monitoring tools for that and inspections that you can do yourself. And then also atmospheric situations, which is what can we do to maintain the health of the home and those basic mold-safe home habits is what I call them. And that's also a free resource you can download. Finally, how to remove it.
There's that in-depth video that I've linked as well on how to remove it. It is fixable. We just need to identify it, know what materials we're working with, and get those things back to a mold-free level so that we're in a mold-safe home. Hope that was helpful.
See you for the next video.
Mold Made Simple
Read the transcript
Hey, a shout out to Dr. Michelle Young for the inspiration for this video. So just last week she shared on her Instagram page about her current home and what she's moving into and how they found the different issues and how it was a process of elimination to actually get to the source of mold that was in the basement and how they handled it. So thank you, Dr.
Michelle. By the way, she does help people with mold illness, especially kids. She has a really good holistic approach, so go and check her out. I'll link it, all of her information on this video.
So the mold checklist started to really come up in my mind a lot recently because what I'm seeing is a lot of people are only using one data point to try to diagnose a mold issue in the house. And I think about it like if you're going to diagnose a body or someone's health with only one data point, you're going to miss a ton, right? If someone's getting headaches and you just get locked in on it must be this one thing and you throw a med at it or you're sleeping wrong so it must be this and you're not getting a holistic approach of genetics and lifestyle and stress levels and nutrition and air and attitude and all these different things, then we're going to miss a ton. So I have a similar philosophy in the home and her video really, really inspired me on this because the quick story for her house is she was moving into a new home, got all the inspections done, but wanted me to help from a distance assess some photos, the home inspection report, several different things and walk through the process like I do with many people nationwide.
In her home, they only had one sign, and it was a thermal imaging infrared scan in the corner of the basement where it looked like a funky dark shape, and I'll explain about that exact equipment in this video later. But that was the only data point they had that they had a significant issue, potentially. So they assigned to or they wanted to get cut out. They asked me to kind of walk them through the process of who they were hiring in there just to get that investigative removal to see if it was a bigger issue or if it was just a cold spot, you know, with the thermal imaging camera.
Well, sure enough, they opened it up and it had been a long-term leak from the outside that had just been moving into the foundation walls in the basement. They needed to get that handled. A lot of visible mold was down there. They were going to get a lot of things cleaned up anyway, and it was safe because they could do all this on the way in.
That was the only really significant mold issue in that house. So it got me thinking. You do not only rely on one data point. The big issue I'm seeing with a lot of people is if they don't know what they're looking for, they might just throw money at a random inspector who's in and out of their house in 20 minutes.
They get an air test and they get a false negative. And so in this video alone, you're going to get way more value than that $500 or $600 wasted inspection that I just described there. If you do get a good inspector who's really going to be thorough, they'll likely use a pretty similar philosophy to what I'm going to talk about here. So this is a forensic kind of investigation here, okay?
We are detectors and we're trying to look at things 360 and multi-layer with the equipment we have. We also have a lot of limitations, okay? So I think new technologies are going to come in, new monitoring devices, mold dogs have a technology and their senses that humans don't. So there are limitations, but this is my philosophy on inspections that I do in person.
And by the way, a big key component is you don't rush through this in under an hour. I mean, this is a multi-hour long scope type of job to really assess a home. But for you homeowners, you can run through this pretty quickly and get a really good lay of the land before even hiring an inspector. So that's really a big passion of mine is before you spend a dollar with me or with anybody, go learn the stuff you can for free and then understand how to qualify someone based on things like this.
I'm giving you those cheat codes. So the mold checklist, okay? How do I look for issues in a home? Well, we'll call this the client interview, like you would at a doctor's office, hopefully with a good doctor, is what's the history of the home?
Any renovations? Is there water damage? I have all this in my questionnaires that I send to people where we have a really good idea of what are the symptoms like? Do you feel different in the home versus out of the home?
All these historical pieces of information are so important to start to get an idea of different things. If I hear about the three leaks you had in the one, you know, master bedroom or bathroom area, well then I'm already kind of, you know, getting warmer on a potential issue. So you collect as much data here, right? We check that box of a really thorough interview and there's several, several things to be asking in this process about the history of the home, about renovations, were things covered up, current or previous water damage, how the owners had previously kept the home, how have the maintenance steps have been, is this a new HVAC system?
You're gathering, gathering data. This is part of my mold timeline as well. So look into the mold timeline video. Next up is visible evidence.
So now the inspection starts and I'm using my eyes. What can I see? What are the signs of water damage? Swelling, building materials, warping, different materials, you can see staining, right?
Different things that show water damage. And using a bright flashlight will make your eyes see a lot more. You start to skim a wall or skim a surface here, you're going to see texture, you're going to see a lot of different things that the naked eye wouldn't see. So a bright flashlight is going to be your cheat code there.
Everybody can get that, right? Get a good bright flashlight for under 30 bucks. Then we start to, now we check that box, right? So we're making progress here.
We're not just running into a house and collecting a test and thinking that's going to just give us more data than all this, right? Next up would be smells and senses. Okay, I really take into consideration that right brain approach, not just the logical numbers, but also how is someone feeling? I've literally had moms in the home say, "I just know there's an issue right here." And sure enough, I inspect and do all this and more, and they were right.
There was an issue in that area because of their senses. So whether it's a sixth sense or just being environmentally attuned or different sensitivities, whatever it might be, we need to really be aware of what is our body telling us or just what are we sensing and smelling. That's a huge one, is the microbial volatile organic compounds, the MVOCs that get released off of mold can start to move us in the right direction as well. And those smells have potential health issues.
More information will be coming out on that. Is there a musty odor? You know, how do you feel in this room, right? So now we're just getting more and more data points where we're starting to fill in a lot more information to give us that high likelihood of is there a mold issue here or not?
Can we confidently say no, we're good, or yes, there's an issue? And that's why we use all these different factors. Thermal imaging. This is my next step personally when I'm doing an inspection.
You don't need to have this as a homeowner necessarily. If you want to invest $300, $400, $500 to get a good thermal imaging camera, it can save a lot. I've found a lot of active issues that way. But some people think that's kind of the end-all be-all.
It just gives us a temperature differential infrared visibility on different things. It will show if there's an active issue of a funky, you know, shape of a dark spot that could be moisture. That's why my next data point is very important to merge with the thermal imaging scan. So I'll walk the whole house.
I'm looking for hot spots, cold spots, different places where there could be a potential moisture infiltration. And that's another one. So does my thermal imaging camera by itself, does that scan tell me everything that this tells me, this tells No, we need to put them all together. They all hold ground in this.
Next up, moisture reader. So a good moisture reader is a pin or pinless one. You're either going to puncture the material to see if it's wet or just put a surface meter on there and should have a sensor that goes in it. It's very dependent on a good moisture meter, what type of material you're on, what's dry standard.
There's different moisture meter kind of ways to use it that's very, very important. So if the thermal imaging camera is showing a funky dark blue spot, that's likely moisture. Not every time. So what do I do?
Go and confirm it with the moisture meter. I put the surface meter on it, get a photo of that. I maybe put the pins in there to see if it's, you know, really saturated there. Many times it is.
Okay, we have high likelihood. The history of the home had a previous leak, right? So we know where we're going there. The visible evidence is showing us something.
We're smelling something. We found it here. We're having high likelihood of a mold issue, right? If all these things are checking off and there's no issues, does that mean we have no mold?
No, we just continue this process. Maybe the borescope camera goes in next. Borescope camera is only $30 on Amazon and that goes into really hard to reach areas. You can pull the cap off of a shower head, off of a sink underneath, and you can put that borescope small camera back in there.
And now you have a lit up camera that's going into places you could have never reached and it is giving a live feed onto your phone. For $30 on Amazon, every homeowner can have access to places that would not be accessible unless you had to remove the material out. Love using borescopes. This one tool takes me maybe two hours of my inspection, is just using that in different areas that are potential hotspots.
Around plumbing is a big one, and several other places that we can't find. There's a lot of other things, tips and tricks in the inspection process, pulling some carpet back, you know, just knowing where to look throughout the home and really staying curious, pulling some insulation back if we need to in different places. But these are kind of the kind of catch-all at the end, right? So I'm looking at all these data points, then I'm assessing humidity.
Oh wow, this room is much more humid. Why is that? This room stays cold all the time for whatever reason. This area in the basement has so much dust or the attic is full of dust accumulation.
What's the status of the HVAC system? That's a whole video in itself, but whatever's in that is dispersing throughout the home. So that is a key, key, key component, as well as the ductwork. How's the circulation and ventilation in the home and the building science aspects of that?
The exterior of the home, is there moisture just sitting around the foundation, kind of seeping in? Do we have issues with the stucco outside? These are a lot of exterior signs that we can be looking for and really just an overall big 360 top to bottom approach and assessing every aspect of the home where moisture could be coming in. And we're checking that.
After all that, we probably have a good idea where to test. We found an issue behind the sink with the borescope. We found with the thermal imaging camera a cool zone that did confirm as moisture. Now we can get a proper testing strategy.
Let's take a swab of that, what we saw with the bright flashlight when we looked there. There was a really funky smell under the sink that we couldn't find much, but the smell was really there. Maybe we need to take an air test under there. Now the testing starts to come in.
We're just curious about how filthy this old carpet is that we inherited from the previous owners. Well, we can do a disturbed air sample and move the air sample over the carpet and disturb the air to push that stuff up and out and get an accurate reading of how contaminated that carpet might be because carpets are quite dust reservoirs and hold a lot of history. So I hope you're connecting the dots on the fact that I don't go in a house and do a random thermal scan and think that I found everything or, oh, you're good. That's false negatives.
It's lazy. It's not, it's just not professional and it's not going to give you any thorough type of reading on the home. After we've done all this, we get the testing, then we can start to move down the mold timeline. That's for the next video that I've already done that you can go and check out.
What are those steps in the mold timeline so that we can actually get this thing done in an effective way and do what Dr. Michelle did, which was got all these things done, tested effectively, got a remediation plan, removed, dried, cleaned, and covered every single base so that now her and her husband can move into the house feeling much more confident because they did cover all these and cleaned on their way in, that they'll be in a mold-safe home. Hope that was helpful. If you have more questions, you need help one-on-one, I have in-person options that I'll fly out to you if need be.
If not, and you can do all this stuff yourself and you still need help after that, we can work together one-on-one virtually and talk about all this. Get the photos, get the videos, get the test results if you have any. Look over remediation estimates, make sure that you're going to be spending the right amount in the right places. You're not cutting corners, but you're not going too over the top and whatever questions you might have as a renter or homeowner.
Be sure to subscribe here at Melrose Mold Solutions and I hang out on Instagram often at Melrose Mold Solutions as well, so see me there.
Without these 7 steps, mold will come back
Read the transcript
Hey, how's it going? Get a lot of questions about fogging the home. So what is fogging? Do you use it?
Is it useful at all? Is it going to make things worse? Okay, so maybe you've heard something about this, maybe you have no clue what I'm talking about. So fogging is like this fogger, it literally looks like a gun and you spray very, very small, it could be like a dry fog, thermal fog, like very, very small particulates of water droplets into the air.
So some people kind of use it as, it's a very polarizing topic by the way, some people use it as a standalone treatment, okay? So, okay, there's mold in the house, let's fog the whole house. Not recommended. I'll explain why.
First of all, I just want to say, what is your goal when it comes to fogging? If your house has already got a very clean bill of health, you're in great shape, you're already maintaining air purifiers and, you know, humidity levels are low, there's no mold source in the house and you're kind of just in maintenance mode. Maybe fogging the house is one way to kind of apply a safe solution like an EC3 citrus, you know, base spray or just something that you want to kind of clean and then do a damp wipe down, which we'll talk about. If you have a mold source in your house, fogging by itself is not a standalone treatment.
Why? Because what is our goal? Our goal should be removal, right? So if you have mold present in your house, fogging mold is not gonna solve it because it doesn't remove it, right?
It might change it, you know, chemically or structurally or kill it or whatever these words are, but that's not the goal, at least based on my philosophy and many others, that the goal is to remove this. If mold is like a microscopic plant or tree, which I often refer to, if you had a plant or tree in your house, you would not just spray and walk away, right? You would remove it. So if our goal is to remove the mold, then that's the number one step.
So when I say fogging, does it work? For that, no, not at all. What is the function of fogging? Why is it even around?
Well, it's actually very functional in certain situations. What situations would be? When is the best time to fog? Well, if you've seen my mold remediation video, it's going to be talking about removing the building material that needs to be uprooted and actually physically removed.
And you're disturbing a ton of stuff in that contained environment. You have negative air pressure going, you have this contained environment where particles are kind of all over the air or all throughout the air. And I want to use a picture that might be helpful for you. So here's our example.
If these are mold or airborne particles in the air, okay, this is the function of fogging according to the IICRC mold remediation protocols, okay? The function of fogging is to actually knock particles out of the air so that they land on the surface and then we can clean them. So you know when the sunlight comes through the window and you see like little particles just floating in the air? Well, those are represented here, okay?
They're just floating, they're kind of drifting in the air. When you're in a mold remediation, especially a crawl space or attic, when insulation and dirt and dust and debris are all getting kicked up, the air scrubbers should be cleaning them, but it's still this stuff has like been kicked up for a while and that stuff's just floating in the air. So we need to clean the surfaces, which we've talked about in other videos, but how do you actually clean the air? You can wait for that air scrubber to do as much as it can and filter the air as much as it can and do cross-ventilation and all this stuff, but fogging can literally go into those hard-to-reach places and start to knock stuff out of the air.
So how does it do that? This is the fogger here, okay, and it's going to spray the water droplets into the air. And so back to the picture, if you see the sunlight coming in the window and you see the little particles, if you were to take a spray bottle and just spray a little right there towards those particles, that spray bottle most likely would microscopically, those water droplets would grab onto those light particles and airborne whatevers and knock them down. They will cause them to be heavier and knock them down.
Think of a rainstorm, right? It's going to knock all that stuff out of the air, all the pollen, right? That's why people get a lot of pollen buildup on the ground. That's the same thing.
Water is coming and knocking that stuff out of the air and knocking it onto the surface. So then what's our goal here? Well, it is HEPA vacuuming and doing a microfiber damp wipe down because the goal is removal, right? So when we're trying to remove, the best way to remove out of the air is going to be air scrubbing, cross ventilation, you're cleaning the air as best you can.
But fogging can be extremely helpful, especially in, I said when's the best time to fog? In crawl spaces, in attics, in hard to reach zones. There's a lot of different curveballs that happen in a remediation process where fogging within the contained environment especially, and you can do the rest of the house as long as there's not other sources, you'd be fogging a safe solution, AC3, Benefac Decon 30, you know, maybe a smaller peroxide-based solution, not one of the more concentrated stuff, but you want to get a safe solution. There are other good ones out there.
Forgetting the names right now, forgive me. BioBalance, I believe, is one. Citrusafe, I believe, is one. So yes, you can fog.
That is not the end-all be-all. I always recommend that it's done kind of towards the last 20% or so of remediation because we need to really remember our operation and what our goal is here. Remove, remove, remove, and then one way to remove out of the air is to knock the stuff down to the ground and then go ahead and clean it up off the surface. HEPA vacuum, wipe down, and maybe you fog again to do that and knock it down.
So does fogging work as a remediation solution all by itself? You tell me. If you had a tree in your home, would you spray it with something and think that that's going to take it out of your living room? No.
So fogging by itself, not effective. Fogging in conjunction with a remediation plan where you're knocking stuff out of the air, getting into these cracks and crevices and hard to reach places so you can go and clean it might be a great, great way of completing your remediation properly. Again, it should be approved based on what you're okay with being used in the home. And I don't recommend changing the chemistry and the ecology of the home so much by just kind of constantly spraying different solutions throughout the house, right?
There's a great video by Corbett with Home Performance, which I will link somewhere and I just will keep promoting his page. He is a wealth of knowledge, but he talks about ozone generators and especially on this little clip and video, but how much we want to do this like special silver bullet to kill everything in a house or what it's doing is changing the chemistry in the home and it's really, he explains it much better and that's not for this video, but when we start introducing new things into the home, it can cause a whole host of things. So we want to keep it really simple. We want to physically, manually remove stuff as best we can.
That's cutting stuff out, that's HEPA vacuum, that's wipe down. That involves no chemicals right there. So if we're going to introduce any form of solution, we want to obviously make sure we're good with that solution being safe and non-toxic, and then we want to use it where it's most needed. And this is one way that it can be used.
So goal is removal. What is the function of fogging? To knock stuff out of the air is the most basic function that it has. And the best time to fog is towards the end of remediation, and especially in crawl spaces, attics, and other hard-to-reach zones where the cleaning can be potentially difficult.
And so does it work? You tell me. Sometimes yes, sometimes no.
Does Fogging Get Rid of Mold?
Two guides we give away for free.
We made these to save you money and time amidst all the info out there.
Mold education, straight to your inbox
Practical tips from Andrew, new videos, and what we're seeing in the field. No spam, and you can unsubscribe anytime.